
Part One: Planning
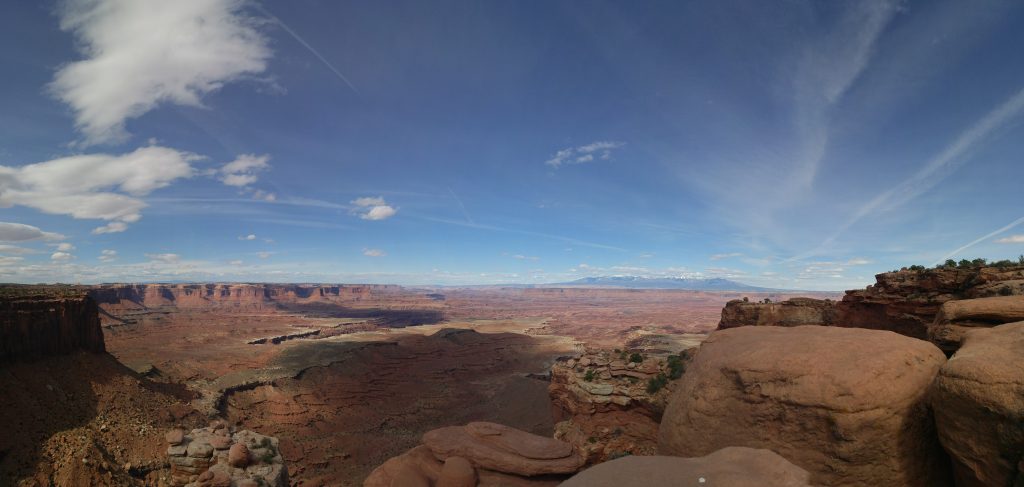
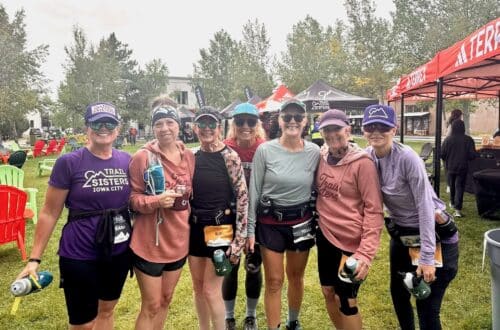
What grand adventure idea inspires you? Maybe you’ve seen a photo of an iconic trail and resolved to run there. Maybe a mountain range you’ve glimpsed on a road trip calls to you. Maybe you can’t get someone’s fastest known time on your favorite trail out of your head. My adventure ideas simmer in my head constantly. There are projects and routes that return to conscious thought when I’m waiting at a stoplight, falling asleep or clicking through spreadsheets at work. Our Trail Sisters community is full of women with grand adventure ideas, exemplified by the Trail Run Adventure Grant awardees. These women have explored trails in Iceland, attempted a committing alpine traverse in the Wasatch, set an FKT on the Long Trail, and trekked 1000 miles to raise money for Alzheimer’s research (to name just a few examples). I hope all of us have an adventure idea brewing in our heads, and that we let ourselves dream without limits.

Usually, dreaming up new adventures is fun. Hopefully, experiencing the adventure is fun too. But in between an idea’s conception and execution looms an intimidating gap. Getting from idea to actually tying our running shoes and hitting the trail takes some hard work and careful planning. In June, I wrote a brief how-to article about self-supported adventure runs. After writing that article (and going on a few running adventures of my own this fall), I’ve expanded that article into an in-depth, four-part series. My goal is to help women close the gap between dream and reality when it comes to running adventures.
First, we’ll talk planning. Soon, you’ll also see articles on equipment & supplies, safety, and mindset. Many of you Trail Sisters already are adventurers—both aspiring and experienced—and we want to learn from you, too. Please comment with questions and your tips for making your self-supported adventure runs happen. Let’s get more of us on the trails achieving our goals, wherever and whatever they are.
Now onto planning. Have an adventure idea? Time to do some homework! By planning well, you can train more appropriately, pack sufficiently, and be prepared when something doesn’t go according to plan.
Once you’ve decided on a route, get your hands on detailed maps. To best prepare for your adventure, a detailed topographic map can’t be beat. These maps convey critical information that is learnable with a few map-reading skills. Between a handful of map makers, up-to-date maps are available for the vast majority of trails in the US, and there is usually one company that’s best in a particular region. A local outdoor store can point you to the best option, even by phone. You can also order a custom topographic map of anywhere in US here. These maps can certainly intimidate if you’ve never learned to read them. Read on for some basic map-reading skills. If you’re a map expert, skip ahead for more about planning your adventure.
MAP READING 101
A map is most useful for navigating in the field when it’s oriented accurately to real-world compass directions. To orient your map, you’ll need a compass. An inexpensive basic compass is best for general navigation. There are many compass skills one could learn, but for basic “staying found” purposes, know how to lay out your map so north on the map corresponds to north in real life. With your map unfolded on a flat surface, turn your compass’s dial so the N on the dial lines up with the big arrow on the baseplate (A). Then, put your compass on the map with the edge of the baseplate aligned with the north/south oriented edge of the map (B). Finally, rotate the compass and map together (as one unit) until the compass’s floating red needle is inside the red arrow outlined in the compass dial (C). Now your map is oriented, meaning that the arrow pointing north on the map also points to north in real life. An oriented map means that if you know where you are on the map, a feature to the right of your location on the map will also be to your right in real life.

Colors: Your topographic map has a few different colors on it. Green corresponds to consistently forested terrain. White indicates an absence of trees; white areas could include rocky terrain or permanent snowfields. Blue indicates water: streams, rivers, lakes, oceans. Roads and trails could be one of several different colors, depending on the map maker (and often differently colored roads and trails indicate different types of roads and trails); consult your map’s key to differentiate.

Contour lines: Topographic maps are valuable because they show information in three dimensions. The thin lines (called contour lines) covering a topographic map connect points of equal elevation. Typically, every fifth or tenth contour line is an index line, a contour line that is bolder and marks larger intervals of elevation. The contour interval of a map is the vertical distance between two contour lines; the map’s key or scale lists its contour interval. In the image below, the map’s contour interval is 40 feet, and every fifth line is an index contour, so the bold index lines are 200 vertical feet apart.

a) How steep is a given area on the map? Close together contour lines indicate steep terrain (there is less horizontal distance between changes in elevation). Conversely, terrain is less steep when contour lines are farther apart. Contour lines that converge too closely to differentiate indicate a cliff.
b) A contour line that makes a completely closed circle indicates a summit or depression. To distinguish between the two, observe whether the elevation of the contour lines surrounding the closed circle increases or decreases.

Becoming comfortable using these skills takes repetition and practice. A great way to increase your map fluency is to find a map for a local area you’re very familiar with, and study it while you’re on those trails. On the trail, orient the map and locate some familiar features on it. Notice how the map’s contour lines correspond to the profiles of landmarks you know well.
Remember that when looking at a map, humans tend to see what they want to see. In the field, if you find yourself disoriented and looking up at a prominent peak, our tendency is to assume the peak must be the highest peak on the map, but often a closer look reveals we had it wrong. Take the time to consider other possibilities.
Comfortable Reading a Map? Time to Plan.
Now it’s time to get acquainted with your intended route. As you study the map, make note of some important details.
- Water sources: a trailside stream or lake means less water to carry. Streams represented by a dotted blue line are intermittent streams and may not flow outside of spring runoff. Streams represented by a solid blue line generally flow year-round, but during a drought even these streams could be unreliable.
- Climbs and descents: the closer together the contour lines, the steeper the terrain. The more a trail trends perpendicularly to the contour lines, the steeper your climb or descent will be.
- Trail junctions: how many times does your route intersect another mapped trail? Do you know which way to go if the junction isn’t signed?
- Emergency exit routes: Should an emergency happen, does your route intersect other trails or roads that offer a shorter path to help?
In addition to studying a map, you can familiarize yourself with your route by consulting other resources. Unless your route remains completely undiscovered, chances are high someone has posted a trip report somewhere on the internet. Read trip reports cautiously, as factors that make a trip good or bad for one blogger may not apply to you. By scouring trip reports, however, you might find a photo of that particularly rocky descent you’re concerned about or learn that the sign is gone at an important trail junction. Public Strava data can provide helpful info regarding elevation profile. Trail database websites like Trail Run Project also provide elevation data and trail descriptions written by fellow runners. YouTube videos provide great visual info on just how steep, rocky, or overgrown certain trail sections are. And of course, the Trail Sisters Forums are a great place to crowdsource beta on your route from other adventure-minded ladies.
Once you’ve gotten to know your route, you can estimate how long your adventure might take. A semi-accurate time estimate is important for preparing well and staying safe—it affects how much food you bring, whether or not you bring a headlamp and when you tell your friend to call for help if you haven’t contacted them. Often, much more than mileage matters when estimating how long your adventure will take. Consider:
- the effect of carrying a heavier load compared to in a race. The weight of gear and food to travel self-sufficiently can add up and make our comfortable pace a bit slower than usual, especially in the early miles of an adventure when packs are full.
- steep climbs. Hikers conservatively budget one extra hour of time for every 1000 feet gained. This may be generous for runners traveling light, but at the end of a long day in the mountains, it just may be spot-on.
- steep, technical descents. A smooth, sustained downhill can be a great opportunity to move efficiently and let your stride open up. But some downhills are so steep (and loose and/or rocky) that for the average runner, they’re hardly runnable. Budget extra time for downhills when the map’s contour lines squish close together.
- off-trail travel. It can be slow going, especially when following the principles of Leave No Trace. Sticking to the rocks when crossing tundra or post-holing through a snow field in a half-melted alpine meadow protects the places we love but can take extra time.
- unplanned detours. When exploring new places, accidental wrong turns are normal. Instead of panicking because the detours put you behind schedule, budget extra time to allow for on-the-spot navigation challenges.
- allotting time to pause and enjoy. Five minutes to quietly sit atop a peak or along a river are often the best parts of my adventure runs.

Finally, familiarize yourself with the weather and climate where you’ll be running. In the US, the National Weather Service provides climate details for the entire country on their website. Note record high and low temperatures for when you plan to run, and pack accordingly. Check the status of local creeks and rivers. If you’re counting on a refilling water on the trail, be sure local creeks and rivers are running. Also note when runoff occurs; stream crossings that are easy in fall can be dangerous during peak flow. You can call a local gear shop or outfitter to check the status of local creeks.
If you’ve planned well, you know when to expect a big climb. You know whether you should bring ten ounces of water or four liters. You know what weather to expect and when to look for an easy-to-miss turn. Self-supported adventure runs can be intimidating, but thorough planning chips away at the mountain of unknown elements. Thorough planning allows us to pack appropriately and increases our margin of safety. For the best chance of success, plan excellently. And then, be okay with whatever remains unknown. After all, the unknown makes the adventure.


4 Responses
Love this article Erica! It makes me excited to go out and find a new adventure! Your Map Reading 101 – for this newbie at orienteering – makes me realize that it is not something to shy away from and is really a lot of common sense once you’ve educated yourself properly. Lots of great information – thank you!!
So glad you liked the article and found it helpful!
Great article and good to see you are still out on the trails!!
Thanks, Greg! I hope you still are, too.